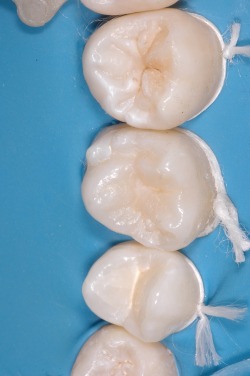
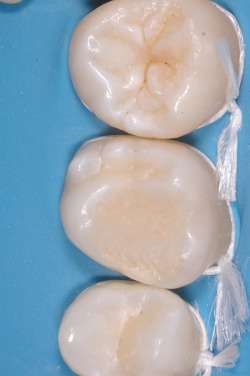
Cases with no or minimal tissue lost
Rubber dam Isolation
Even if the technique can be used even without the rubber dam, field isolation is at least advisible.
Rubber dam should be placed prior to cavity preparation and thus prior to occlusal impression.
Rubber dam should be placed prior to cavity preparation and thus prior to occlusal impression.
Preoperative Impression
Take an occlusal impression with Kristal Dens Clear PVS and Kristal Dens Posterior plastic tray. Wait the material setting (3 minutes). Remove and check the accuracy of the impression.
Prepare the cavity as usually.
Prepare the cavity as usually.
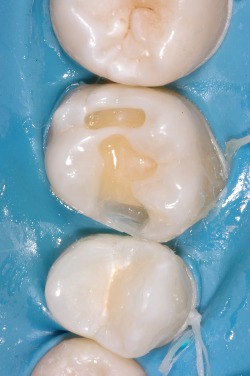
Interproximal and Dentin mass layering
Apply your favorite Enamel-Dentin Adhesiv system following manufacturer instructions.
Restoring a Class II cavity build up the interproximal wall using matrices and wedges.
Remove the matrix and the wedges.
Layer dentin shade resin composite till the Enamel-Dentin Junction.
Restoring a Class II cavity build up the interproximal wall using matrices and wedges.
Remove the matrix and the wedges.
Layer dentin shade resin composite till the Enamel-Dentin Junction.
Enamel layering
Layer Enamel shade resin composite without taking care of the anatomy but just of marginal adaptation.
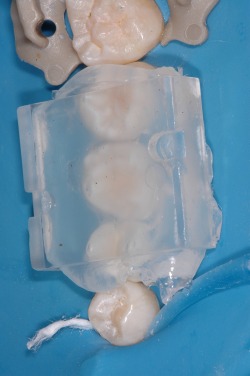
Clear Matrix Checks
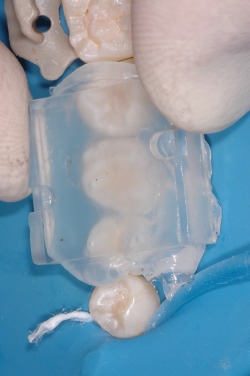
Wet the Impression with an isolating solution (pure alcohol or unfilled bonding agent) and check it on the tooth you are restoring. Apply a firm constant pressure for few seconds and remove the impression. Remove resin composite excesses that have been squeezed beyond the cavity margins or reapply more material if you see any voids. With a very fast learning curve you will calibrate the exact amunt of material you need to avoid extensive excesses or voids.
Final photocure trough clear matrix
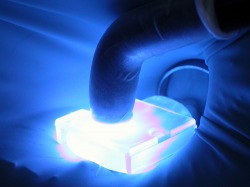
Once you are satisfied by occlusal anatomy reproduction, apply once again the impression and holding it firmly photocure for 40 sec trough the clear tray. Additional photocure for 20 seconds.
Reduced polishing time.
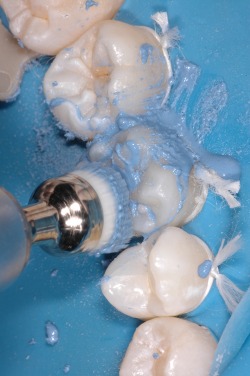
Restoration does not need for finishing. Moreover, as the PVS, has eliminate the oxygen from the restoration's surface there will be no oxygen-inhibited layer therefore the resin composite will only need for few polishing procedures saving time and materials.
No need for finishing & occlusal adjustment
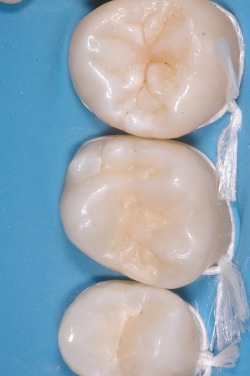
As the final anatomy is exactly as it was at the beginning of restorative procedures there will be no need for occlusal adjustment with a lot of benefits for esthetics, function, surface quality and finally long term clinical success.
